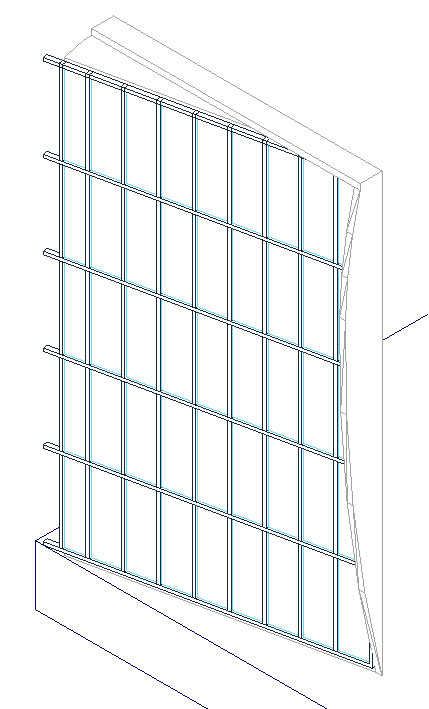
Using this method we create a curtain wall using manual vertical offsets and then assign a blank infill to the end cells to display the exposed mullions.
51. From the menu select: Design -> Curtain Walls -> Curtain Wall Styles
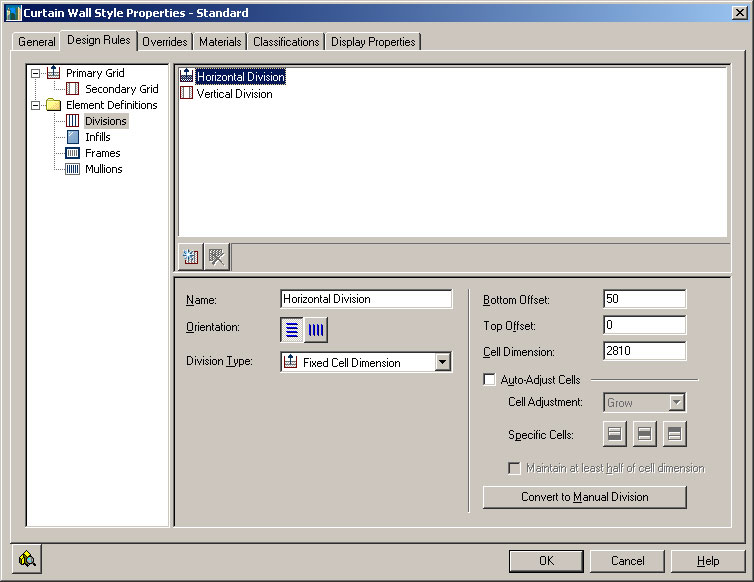
Double left click on Style Standard to display the Curtain Wall Style Properties Standard
Select Design Rules tab
Set the following options in the under Element Definitions settings:
Divisions
Horizontal Division Division Type: Fixed Cell Dimension
Bottom Offset: 50
Top Offset: 0
Cell Dimension: 2180
Auto-Adjust Cells: False (NO tick)
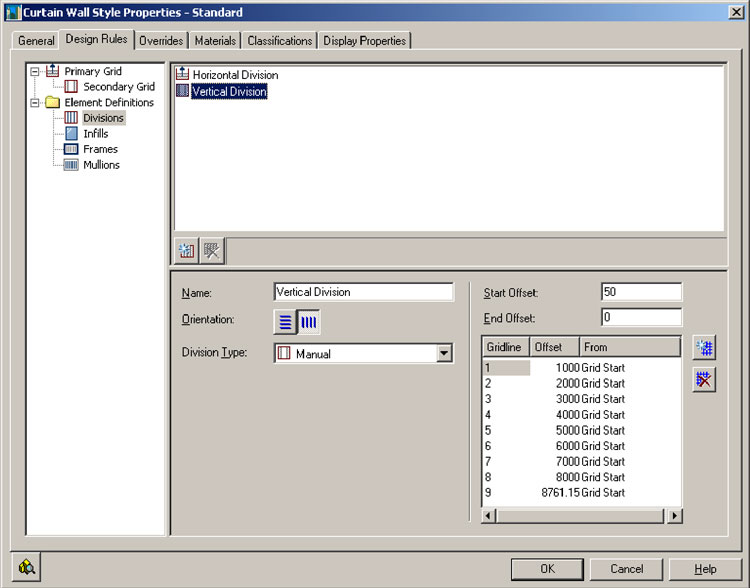
Vertical Division Division Type: Manual
Start Offset: 50
End Offset: 0
We require 8 cells divisions @ 1000 spacing and 1 cell division @ 761.15. The final cell division will automatically be created. We will change the type of Infill for this cell division to create the exposed mullions later.
Select Add Gridline button/icon (9 times) to add the 9 vertical cell divisions.
| Gridline | Offset | From |
|---|---|---|
| 1 | 1000 | Grid Start |
| 2 | 2000 | Grid Start |
| 3 | 3000 | Grid Start |
| 4 | 4000 | Grid Start |
| 5 | 5000 | Grid Start |
| 6 | 6000 | Grid Start |
| 7 | 7000 | Grid Start |
| 8 | 8000 | Grid Start |
| 9 | 8761.15 | Grid Start (last division at different spacing) |
Note double left click on the Offset value to change and click on the From value to select Grid Start, Grid Middle, or Grid End.
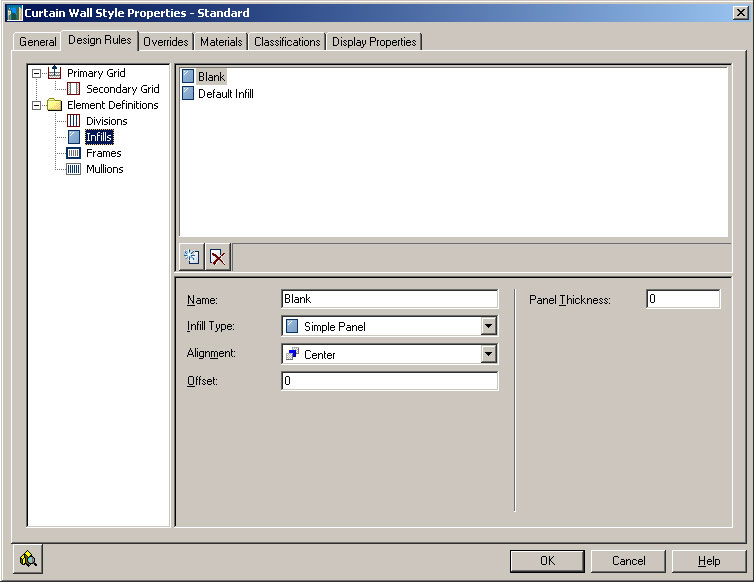
Infills
Create a New Infill by selecting the New Infill button. Set the new Infill with the following parameters:
Name: Blank
Infill Type: Simple Panel
Alignment: Center
Offset: 0
Panel Thickness: 0
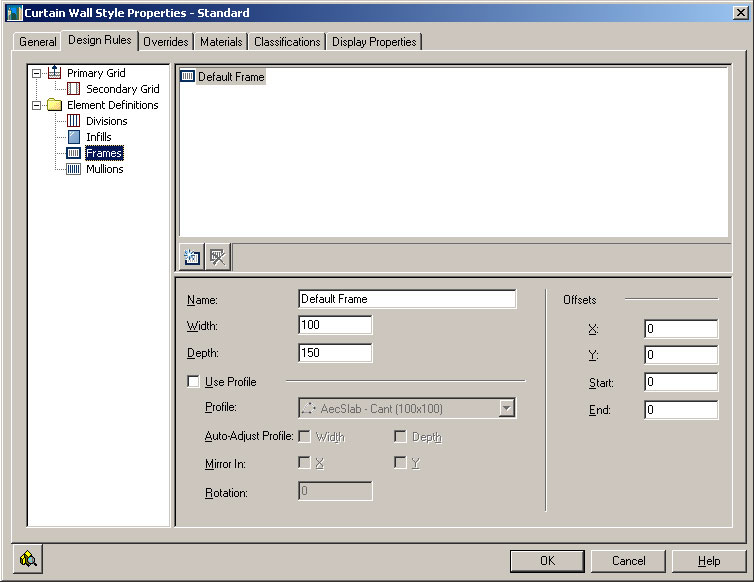
Frames
Default Frame parameters: Width: 100
Depth: 150
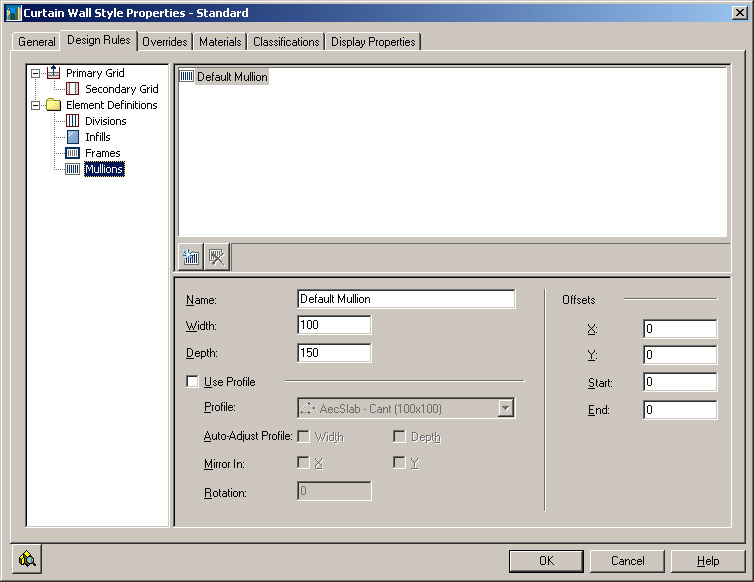
Mullions
Default Mullion parameters: Width: 100
Depth: 150
Select OK button to save Curtain Wall Standard properties.
Select OK button to save and exit Curtain Wall Style Manager.
52. From the menu select: Design->Curtain Walls->Add Curtain Wall
In the AutoCAD Properties dialogue box the properties of your Curtain Wall is set dynamically
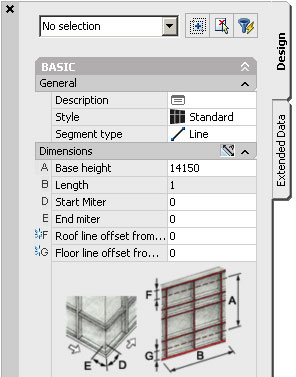
Change (A) Base Height: 14150
Now let create the curtain wall:
Type: -75,0,200 (Press Enter)
Type: @0,9300 (Press Enter)
Type: (Press Enter) to exit command.
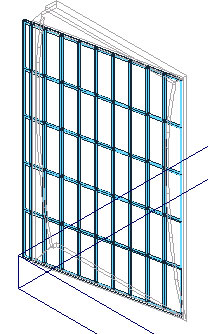
53. Curtain Wall has now been created but will need to change the type of infill for the end panel, extend the mullions and remove the vertical end frame.
Select the Curtain Wall to display the objects GRIPS boxes, then Right Click and Select: Frame/Mullion -> Override Assignment.
Select the End Vertical Frame and the Frame Assignment Override dialog box is displayed.
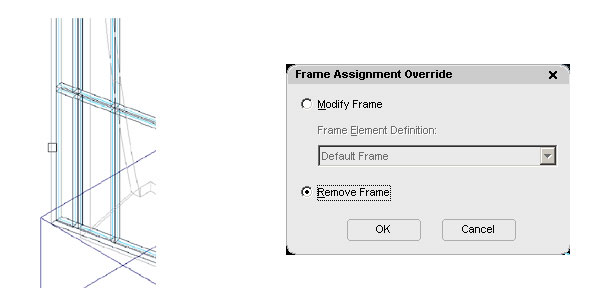
Set the Override to Remove Frame then select OK button
End vertical Frame is now removed.
54. Select the Curtain Wall to display the objects GRIPS boxes, then Right Click and Select : Infill -> Show Markers.
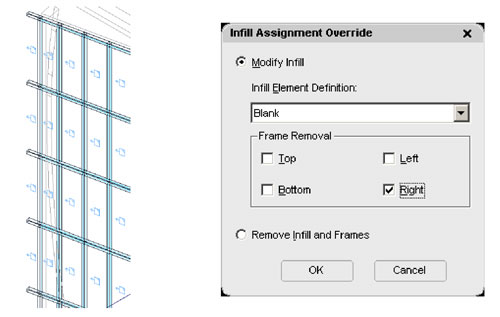
55. Select the Curtain Wall to display the objects GRIPS boxes, then Right Click and Select: Infill -> Override Assignment.
Select each all of the 5 vertical End Infill Panels markers then (Press Enter) to display the Infill Assignment Override dialogue box.
Modify Infill Element Definition to Blank and select Right Frame Removal, then select OK button.
56. Select the Curtain Wall to display the objects GRIPS boxes, then Right Click and Select: Infill-> Hide Markers.
57. Type: Regen (Press Enter)
This is to refresh the building model.