Once the computer exists in the directory and the desktops know about the WINS server you can begin the fun task of adding machines to the domain. Whilst straightforward this bit is a little time consuming as each desktop must be rebooted once domain configuration in complete.
Before you begin make sure each of the desktops has no active connections to your Samba server (dismount any network drives).
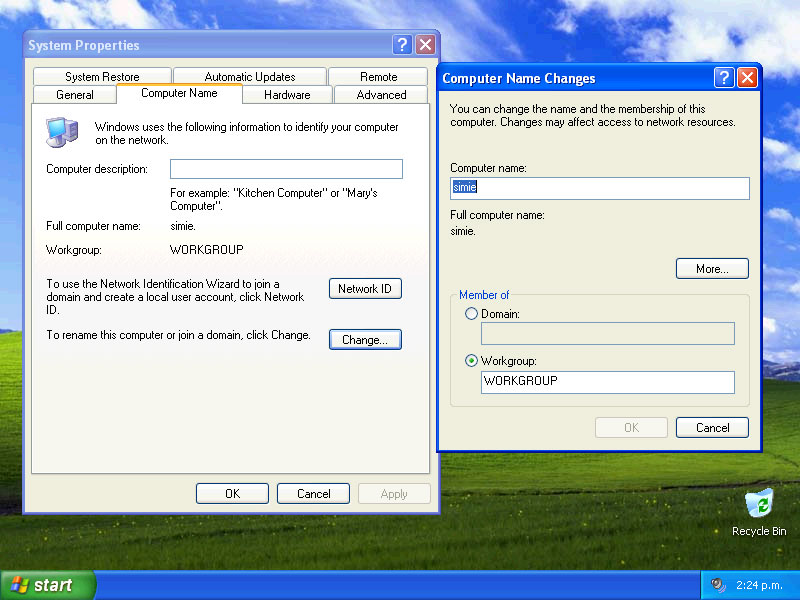
To join the domain right click on My Computer and select the Computer Name tab. Press the Change button and select the ‘Member of Domain’ option. Enter the name of your domain in the textbox. Press Okay, listen to the hard disk churn and as long as the desktop can see the WINS server you should be presented with a Domain login box. Enter the details for your Domain Administrator which in Samba’s case is the root account and the password you specified way back when you were setting up things initially.
After more churning you should be presented with a message saying you have successfully joined the domain. If you get an error message check the following:
- Does the desktop have a configured WINS server? (at the command prompt run ipconfig /all)
- If it does make sure you only have one entry for this server. If you are providing WINS server details over DHCP remove any manual WINS server addresses you have added as this can cause problems.
- Is there any firewalls blocking connections?
- Did you get the correct password for the root user?
- Did you disconnect any network shares before beginning the process?
If any of the above were wrong then correct the issue, restart the desktop and preform the process again.
Once you successfully connect dismiss all the dialog boxes and restart the desktop. After restarting you should see the Windows login screen with your domain available in the Domain dropdown. Test the setup by logging into the machine using a Samba username and password. If everything works Windows should create a new profile for you on this machine and automatically mount your home drive.
Setup a login.bat file
Now that you can login to your domain its time to make a little batch file that runs on the desktop at logon to automatically mount network shares and anything else you may need. The sky is the limit when it comes to writing the batch file and there is plenty of help available on the Web. The one thing you must do is write the batch file on a Windows desktop (using Notepad) or use non-Windows text editor that can save files with the Microsoft style carriage return.
Below is an example login.bat file that mounts the shared directories and synchronises the computer’s time with the server.
echo Setting Current Time...
net time EXAMPLESERVER /set /yes
echo Mapping Network Drives to StressFree File Server EXAMPLESERVER...
net use i: EXAMPLESERVERdata
net use m: EXAMPLESERVERmedia
net use t: EXAMPLESERVERtemp
Probably the easiest way of copying it to the server is to save it to your home folder on the server and then as root copy it to the Netlogin folder (/home/samba) with its ownership set to root (to ensure no changes are made to it).
For a more complex example of a logon.bat file checkout the 'Customised Netlogon scripts for Samba' howto also available on this site.
Check everything works
Once you have setup the login.bat file log into one of your desktops and check that the drives are mounted and time synchronised. If everything works as planned you should be ready to get back to doing real work.
You can change your Windows password by pressing CTRL+ALT+Delete and selecting Change Password. This will change your Samba password in the LDAP server but because of the differing password encryption systems it will leave the posix passwords untouched. If you want to keep both in sync then password changes will need to be done using a web client.