The 10 step guide for getting your AutoCAD model into RayFront for rendering:
1. Open your drawing
2. If the model is not in meters scale itCommand: scale (Enter)
Select objects: all (Enter)
Select objects: (Enter)
Specify base point: 0,0,0 (Enter)
Specify scale factor (or reference): 0.001 (Enter)
3. Move the model to to World UCS origin
View -> Zoom -> Extents
Switch to World UCS
Command: ucs (Enter)
Enter an option: world (Enter)
Command: move (Enter)
Select objects: all (Enter)
Select objects: (Enter)
Specify base point or displacement: Click on the corner of your model
Specify second point of displacement: 0,0,0 (Enter)
Pan to the World origin to find the model.
4. Export to a 3DS file
Menu: File -> Export
In dialog set type to 3D Studio (*.3ds).
Set a location and name for the file. Press Save
Select objects: all (Enter)
Select objects: (Enter)
Accept default settings for export.
5. Make new file
Menu: File -> New
Menu: Insert -> 3D Studio
In the dialog browse to the file and open it.
In the import dialog press the Add All button and press OK
6. Set up a perspective view
Menu: View -> 3D Views -> SW Isometric
Command: dview (Enter)
Select objects: all (Enter)
Select objects: (Enter)
Camera/Target/Distance/Points/../Twist/Clip/Hide/Off/Undo: points (Enter)
Click on the bottom right and top left corners of the model.
Camera/Target/Distance/Points/../Twist/Clip/Hide/Off/Undo: (Enter)
7. Save new file as a DXF
Menu: File -> Save As..
In the dialog set type to AutoCAD 2000 DXF (*.dxf)
Enter a destination and name and press the Save button.
8. Open Rayfront and create a new Project
9. Bring in the AutoCAD dxf file
Menu -> Import -> DXF Geometry
Browse to the location of the DXF file and open it.
In the Import Geometry from DXF dialog enable Closed 2D PLINEs as Polygons and press OK.
In the next dialog ensure all objects will be imported and press OK
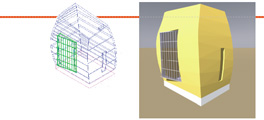
10. Run a preview to check it all works
In the Simulations tab press Run Preview.
In the dialog press the Start Job button and wait.
If all goes well a window should appear with part of the model visible.
Move around the model and save some interesting views
From the menu: File -> Append View to rif File