The Vontz Center, Frank O. Gehry
This tutorial will teach you essential skills for drawing in AutoCAD.
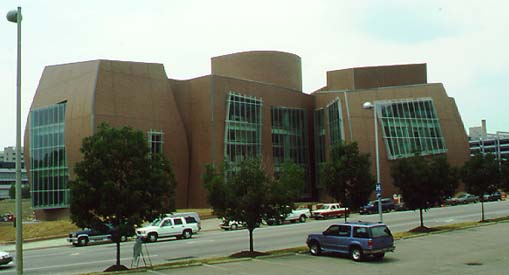
The building that will be modelled is the Vontz Center designed by Frank Gehry. The building was chosen for its challenging yet fairly simple shape.
Below is a series of simple tips to get you started on your AutoCAD'ing way.....
*In AutoCAD you can either type in commands or use buttons. As you get used to the program you will find out which you prefer.
*We will be using Architectural Desktop 2006 for this tutorial. Architectural Desktop 2006 is an enhanced version of AutoCAD 2006. Double click on the Architectural Desktop 2006 icon on your desktop to open it.
*For those of you familar with earlier versions of AutoCAD you can bring up the older toolbars by <Right Clicking> on the blank area beside the toolabrs above the drawing area. The <ADT> button in the pop up window will reveal a range of toobars that can be made readily accessible: 3DOrbit, Dimension, Inquiry etc
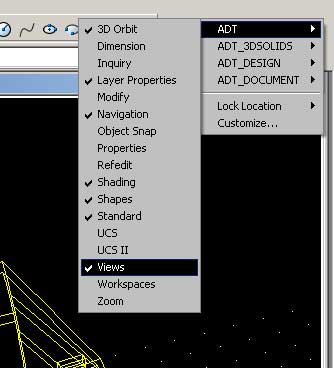
Useful (but not essential) toolbars are Object Snap, Views, UCS and 3D Orbit.
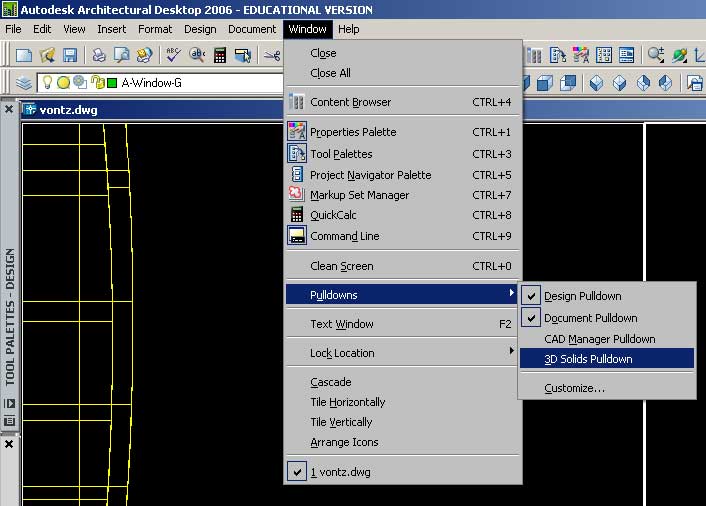
In addition, in the <Window><Pulldowns> menu you will find some useful menu bar items: 3D Solids, Design and Document. When these are selected not only does the pulldown menu list get longer, but when you <Right Click> on the blank portion of the toobar space (as above) you will have a wider range of options - a set of toobars for each pulldown. Under the ADT Solids option, you could find the Solids editing toobar useful.
*To switch views in Architectural Desktop you can select one of the preset views or create your own.
From the menu select:
->View ->3D Views 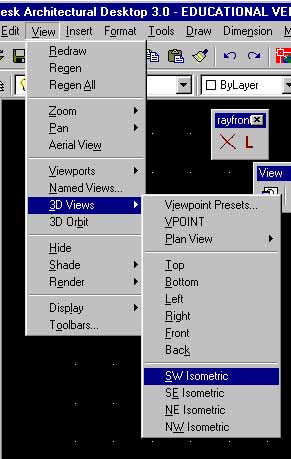
To create your own customised view (or to just view your model from all over use the orbit tool. Click on the Orbit button to change into orbit mode. In this mode you can click and drag on the drawing window to move your model.
By clicking and holding the left mouse button down on the orbit tool a drop-down list of further tools are revealed.
Try experimenting with these tools to get interesting views of your model for rendering. 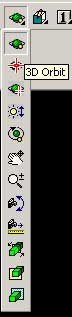
*The UCS is the most important and versatile tool in AutoCAD. It is a 'virtual drawing board' that can be tilted and rotated. Whenever you provide AutoCAD with a two-dimensional coordinate (x,y) it assumes the z value to be 0. As you will soon see the UCS is very useful when drawing vertical and angled surfaces.
*Pressing the left mouse button selects objects or icons, pressing the right mouse button in AutoCAD 2006 brings up a context sensitive menu. This menu contains all the options for the currently selected tool and contains shortcuts to commonly used commands such as the ENTER key.
*This tutorial assumes that you are using AutoCAD 2006 with Architectural Desktop enhancements. The default settings for this programme is to have "Snap to Object" enabled for End Points, Mid Points and Intersections.
This feature allows you to quickly select a point on an object. The cursor will change to a bright yellow box whenever the Object Snap tool has found an intersection, end or middle point to snap to.
* If you have lines on top of one another and are having difficulty selecting the right one, you can press down Ctrl while you select - this allows you to cycle through all the objects at that point and choose the correct one.
*To quickly draw lines that run parallel with the UCS use the Orthographic drawing mode. Press the ORTHO button at the bottom of the drawing window to turn this mode on or press F8.
This is similar to using a parallel rule device on a drawing table.
* Like many programs, AutoCAD has a wide range of shortcuts. These can be customised by editing the acad.pgp file (a text file) in the AutoCAD support directory. For now we will not bother, but if you wish to do this customisation, please set yourself up with the support directory on your I:\ drive! Meantime remember that for most of the commands used in this course there is a shortcut. M for Move, Ext for Extrude, pl for polyline. The full list of standard shortcuts can be found in the acad.pgp file.