Using the subtract tool we will create openings for windows and skylights. In the next section we will create the main window.
Create window openings
23. Change to the SW Isometric view. From the menu select:
->Views ->3d Views ->Front Left Isometric
Change to the world UCS
Type: ucs (Press Enter)
Type: w (Press Enter)
Create a cube to subtract from the shell.
Type: box (Press Enter)
Base Point:
We will construct all the window volumes at the origin point (Point A (0,0,0) ) and move them into position afterwards. Note Point A is the closest corner to you in the SW Isometric View.
This method is easiest to use as we do not need to intially know the 3-dimensional location of the window to begin creating the volume to be subtracted.
Type: 0,0,0 (Press Enter) or click on point A
Type: 5000,8750 (Press Enter)
Type: 14450 (Press Enter)
24. Create the volume for the smaller window.
Type: box (Press Enter)
Type: 0,0,0 (Press Enter) or click on point A
Type: 1925,5000 (Press Enter)
Type: 9350 (Press Enter)
25. Now that the two volumes are created we will move them into place and subtract them from the shell.
Type: move (Press Enter)
Select the larger cube (Press Enter)
Select base point:
Select Point A or Type: 0,0,0 (Press Enter)
Type: @-2000,6820,2255 (Press Enter)
Move the smaller box.
Select the smaller cube (Press Enter)
Select base point:
Select Point A or Type: 0,0,0 (Press Enter)
Type: @6525,-1000,2570 (Press Enter)
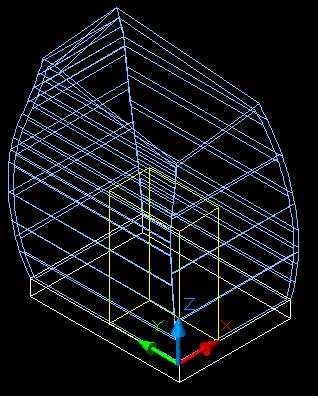
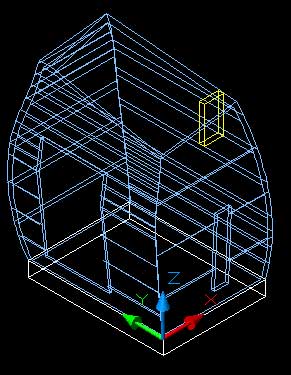
Your two repositioned windows should look like the image below.
26. Subtract the cubes from the shell to create the window openings.
Type: subtract (Press Enter)
Select the wall shell (Press Enter)
Select the two cubes (Press Enter)
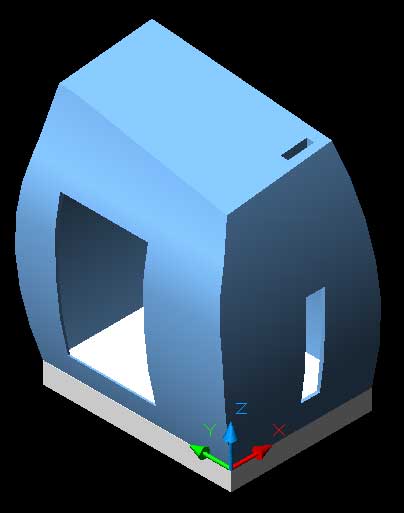
Shade the drawing and change views to check out your new window openings as in the image below. 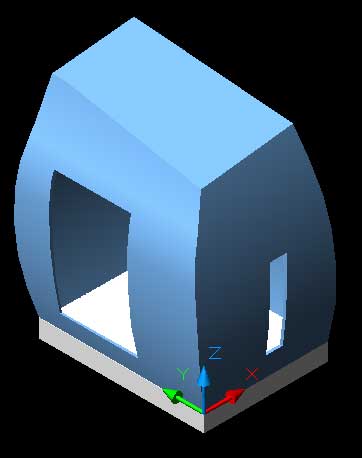
Create the skylight
We will use the same technique for making the skylight but it will be moved into location using an absolute 3-dimensional co-ordinate rather than a relative one as used above.
27. Create cube for subtraction
Type: box (Press Enter)
Select base point:
Type: 0,0,0 (Press Enter) or select point A
NOTE: For this step you can create the box anywhere in the drawing. It does not matter where it is as the box will be moved into position using an absolute co-ordinate.
Type: 2550,700 (Press Enter)
Type: 5000 (Press Enter)

28. Move into location and subtract.
Type: move (Press Enter)
Select base point:
Type: 0,0,0 (Press Enter) or click on point A
Type: 7200,1500,18500 (Press Enter)
NOTE: Notice that there is no @ sign infront of the 3-dimensional co-ordinate.
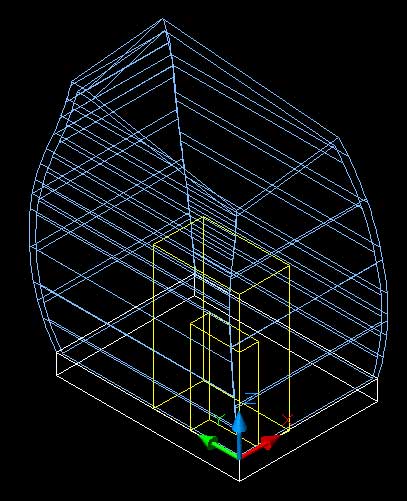
The skylight should be moved to the same position as shown below.
Finally subtract the skylight.
Type: subtract (Press Enter)
Select the wall shell (Press Enter)
Select the skylight cube (Press Enter)
Shade your drawing. Your finished shell should (fingers crossed) look like the image below.