By placing cameras within our model we can gain a first person perspective on our architecture.
Open the Site view from the Project Browser.
In the View Sidebar select the Camera tool.
Move the pointer to a position in the drawing window where you wish to place a Camera object and left-click once.
Do not be too pedantic over where you are standing, you can always move later.
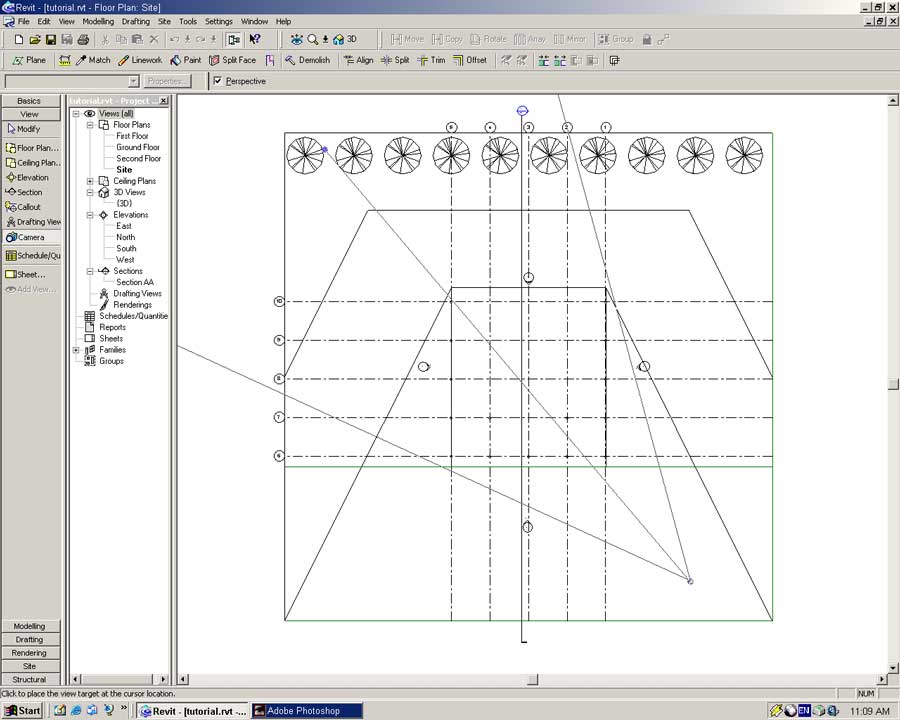
Move the pointer to a position you want to be looking at. Notice the camera turns and field of view lines are projected and you move the pointer. Left-click once more on the place you wish to be looking.
A new view in the 3D Views category of the Project Browser will be created named '3D View 1'.
Automatically this view should be opened. Open this new view if this is not the case.
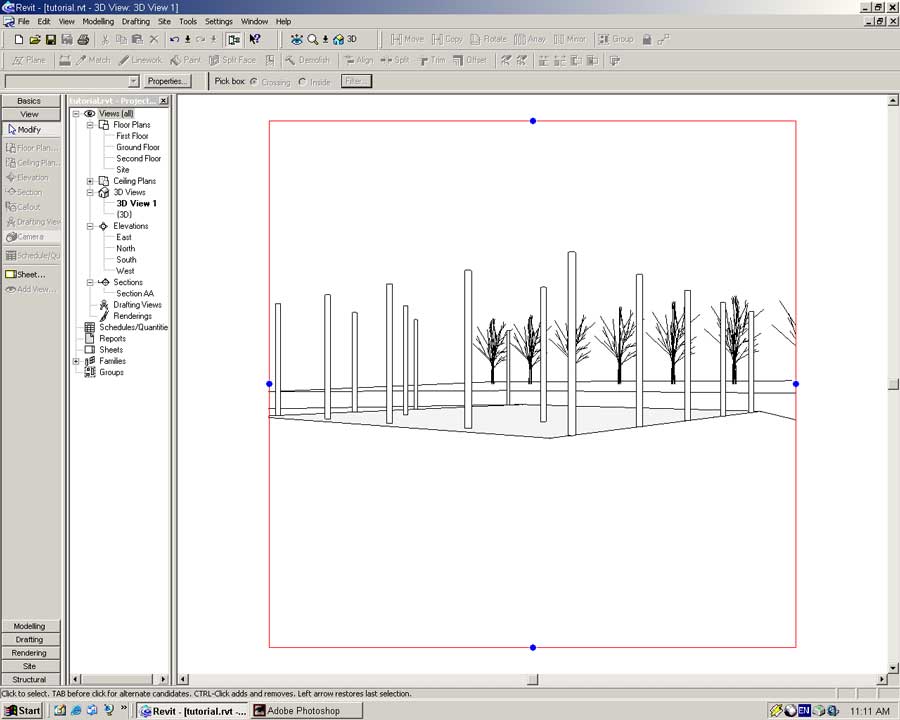
The view can be made larger or smaller by dragging the blue dots in and out.
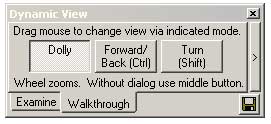
The Dynamic View tool can also be used to modify your view of the perspective.
In the example below I zoomed out slightly and widened the field of view by dragging the blue dots outwards.

Right-click on the view and select View Properties. This will bring up the View Properties dialog.
In the Model Graphics Style dropdown select Shading w/ Edges and press OK.
The view will be rendered in block colour with black edges.

Now we will move the camera to a different position. Open the Site view.
Right-click on 3D View 1 and select 'Show Camera' from the popup menu.
The camera will be visible in the view. Click and drag the camera or target to move them to a new location.
To change the height of the camera or target press the Properties button in the toolbar.
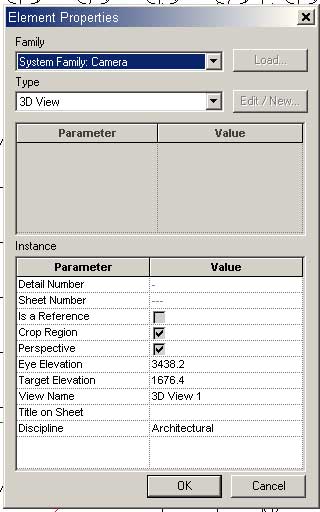
Set the following properties in the dialog:
View Name: Postcard
Eye Elevation: 3500
Target Elevation: 1700
Press OK to accept the changes.
Using the same technique as outlined above the camera and target height can be changed visually in an Elevation or Section view.
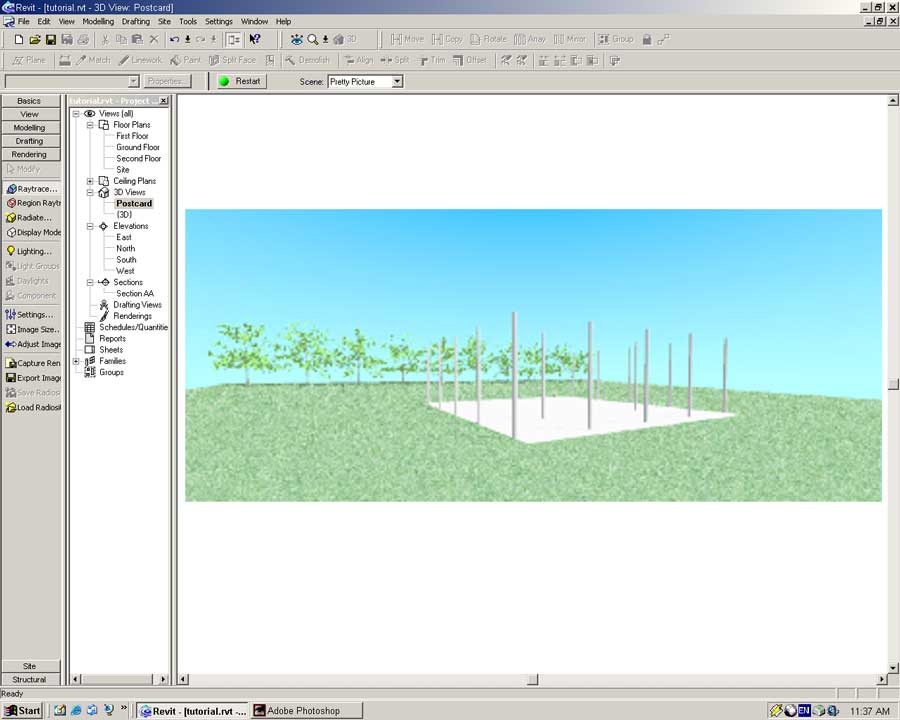
Open the Postcard view to see what the new view looks like.
When a perspective view is open the Dynamic View tool has a series of walkthrough options. The walkthrough options enable you to 'walk' around your model as if it existed in real life. The walkthrough tools are used in the same manner as the normal Dynamic View tools.
Using all of the above tools create some interesting views of the site and columns. Remember it is possible to place more Camera objects in order to have numerous different perspectives.
The Making of a 'Pretty Picture Postcard'
With a nice 'Postcard' view created we will render it in AccuRender. AccuRender is not renowned for its physical accuracy but does allow us to produce some compelling images to show our clients, tutors and peers.
AccuRender has Raytracing and Radiousity tools. In this tutorial we will only use the Raytracing tool.
With the Postcard view open select Settings from the Rendering Sidebar.
Rendering is achieved by defining a Scene. A Scene is a set of rendering settings that can be applied to a view. By defining different Scenes we can quickly perform renderings of different qualities on the same view.
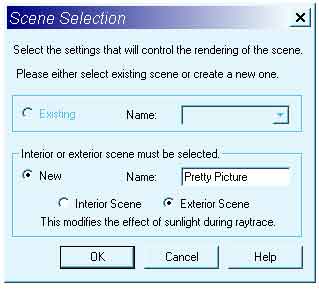
A dialog will appear asking what Scene should be used to render the view.
As we have not defined any Scenes select New and in the Name field type: Pretty Picture
Select the Exterior Scene option and press OK.
The Scene settings dialog will open as shown below.
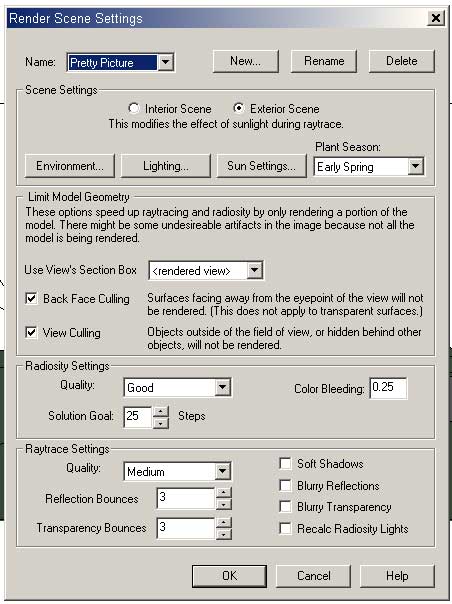
In this dialog set the Plant Season to Summer (we want big happy trees).
In the Raytrace Settings set the following:
Quality: Better
Reflection Bounces: 8
Enable Soft Shadows: Yes
Press OK to accept these settings. Press the Raytrace.. tool from the Render Sidebar.
Your computer will begin thinking. If your computer is really old it may start to smoke and vibrate like a washing machine. (..drum roll please?)
Oooh ahhhh..
With a bit of luck you should have something similar to the above. This is not fantastic and with a bit of tweaking we can make things a lot better.
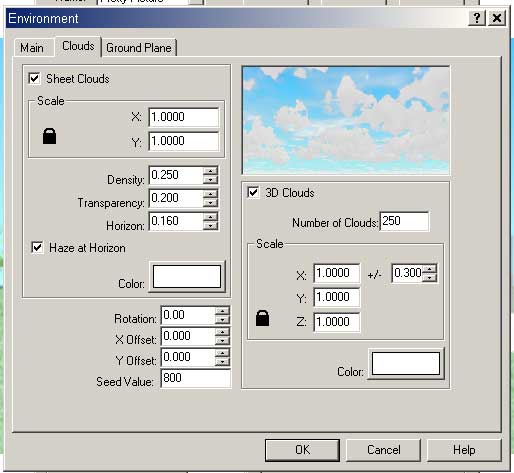
Let's put in a sky and a ground plane.
In the Render Sidebar select Settings. In the dialog press the Environment button.
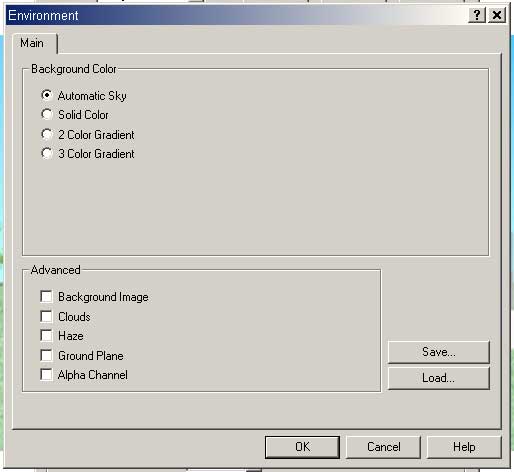
Check Clouds and Ground Plane in the Advanced Section.
As you do so new tabs will appear with Clouds and Ground Plane options.
Open the Clouds tab. You can use any settings you want here but I went for the following settings.
Open the Ground Plane tab. In the Height Above XY Plane field type -10.
By placing the Ground Plane below our ground line we will avoid issues of our site and the Ground Plane intersecting each other. When this happens things get ugly...
Press the Material button to define a material for the Ground Plane.
The AccuRender material browser will open.
Browse to the AR2_ACCUREND library and select the 'grass_bitmap' material.
Press OK to select this as the Ground Plane material.
Press OK in the Environment dialog to close and accept these settings.
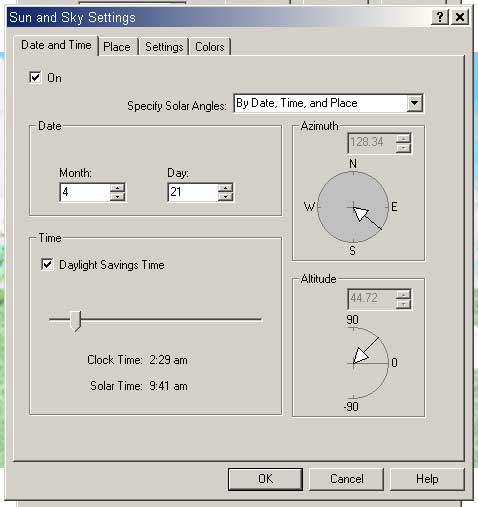
Before we do another rendering we will set the time of day.
Press the Sun Settings button. You can place this model anywhere in the world;
I chose France and set the following Date and Time settings.
Select the Raytrace tool from the Rendering Sidebar and press the Restart button to re-render the image.
With the rendering settings finalized we can increase the image quality using the Image Size tool.
If the rendering was going to be printed the resolution would need to be set at 100dpi or more to avoid jagged edges. For this tutorial we will render images at 150dpi resolution. If you are in a hurry turn this value down to 72dpi.
Press the Image Size button on the Rendering Sidebar.

In the Resolution field type: 150 (Enter)
The Width and Height of the image will automatically change to generate this resolution image.
Press OK and Restart the raytrace. The image should take longer to process but will be of a higher quality.
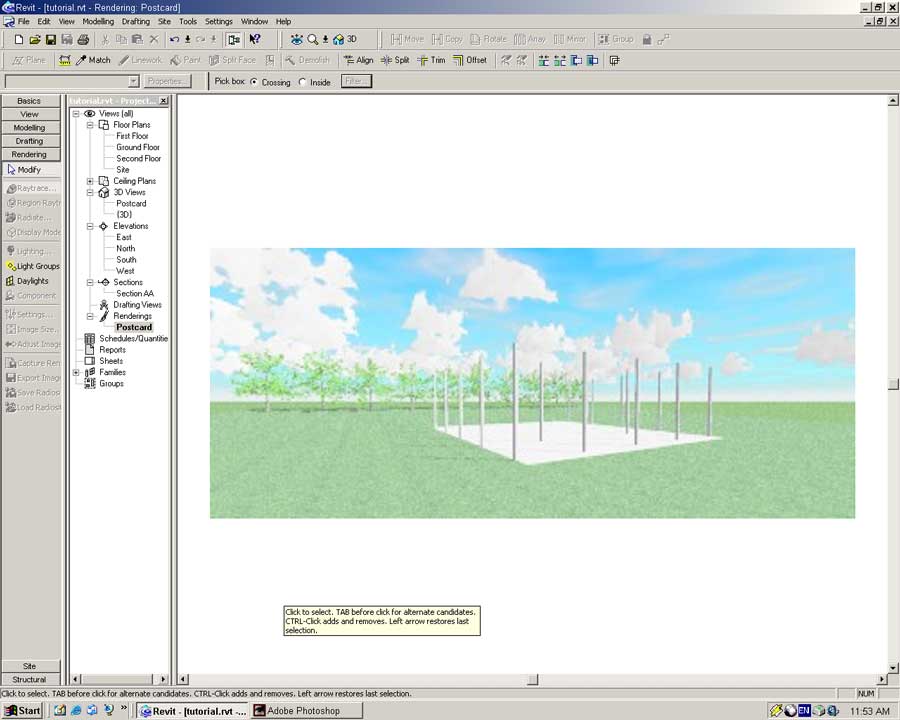
With a nice image rendered use the Capture Render tool in the Rendering Sidebar to create a Rendering view.
After you have pressed the Capture Render tool a view in the Renders category of the Project Browser will be available.
Alternatively renderings can be saved to an external image file by using the Export Image tool in the Rendering Sidebar. This tool allows renderings to be saved to disk and used within Photoshop or published to the Internet.
In the Project Browser go to the Renderings category and right click on the newly captured rendering (probably called Postcard).
Select Rename from the popup menu and type a new name for this rendering.
This will ensure your captured image will not be accidentally overwritten by a new Captured Image.