If you would rather experiment with a more automatic way of generating the window follow the steps outlined below or in the next section.
49. Select the SW Isometric viewpoint.
Turn the walls layer off to simplify things.
Make the current layer 'construction'.
Restore the 'window plan' UCS.
Type: ucs (Press Enter)
Type: restore (Press Enter)
Type: window plan (Press Enter)
Or open the UCS dialog box:
->Tools ->Named UCS... and select the window plan UCS as current.
50 Create new Layer call CurtainWall, colour = 157 and make it the Current Layer
51. From the menu select: Design -> Curtain Walls -> Curtain Wall Styles
Double left click on Style Standard to display the Curtain Wall Style Properties Standard
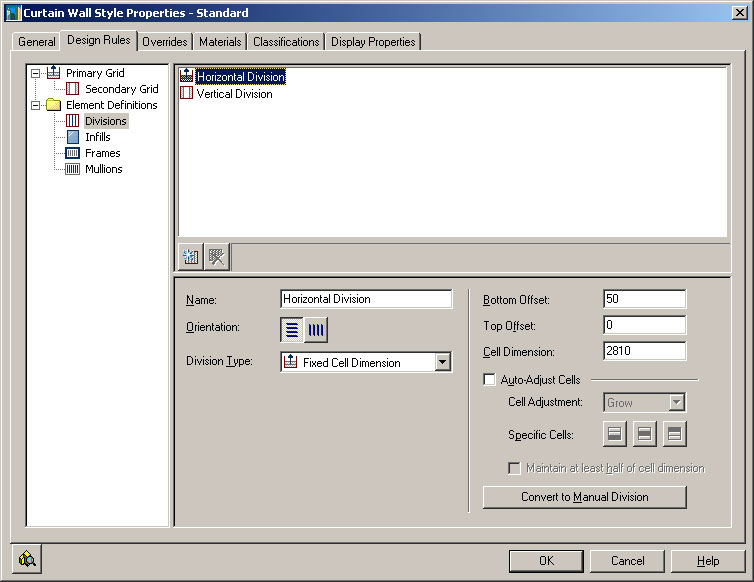
Select Design Rules tab
Set the following options in the under Element Definitions settings Divisions
Horizontal Division Division Type: Fixed Cell Dimension
Bottom Offset: 50
Top Offset: 0
Cell Dimension: 2180
Auto-Adjust Cells: False (NO tick)
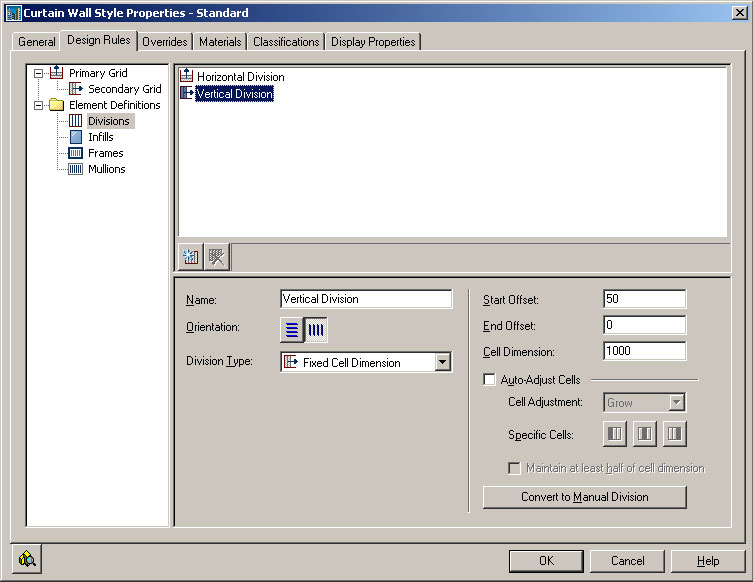
Vertical Division Division Type: Fixed Cell Dimension
Start Offset: 50
End Offset: 0
Cell Dimension: 1000
Auto-Adjust Cells: False (NO tick)
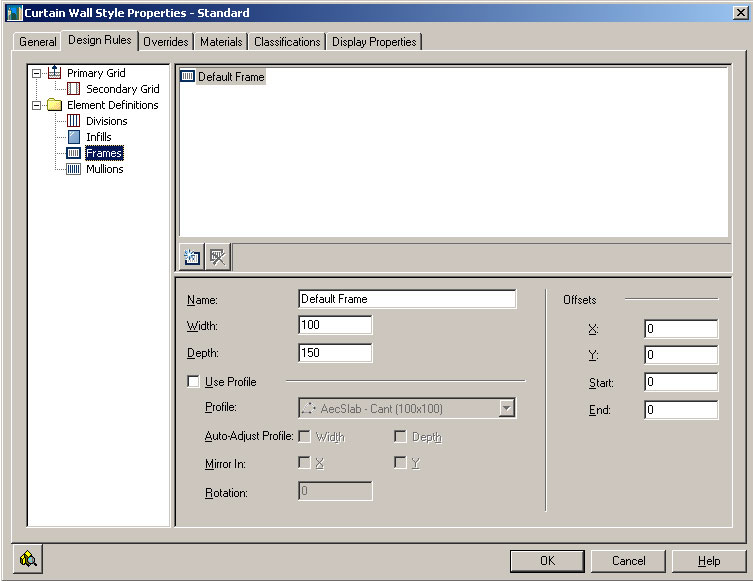
Frames
Default Frame parameters: Width: 100
Depth: 150
Mullions Default Mullion parameters: Width: 100
Depth: 150
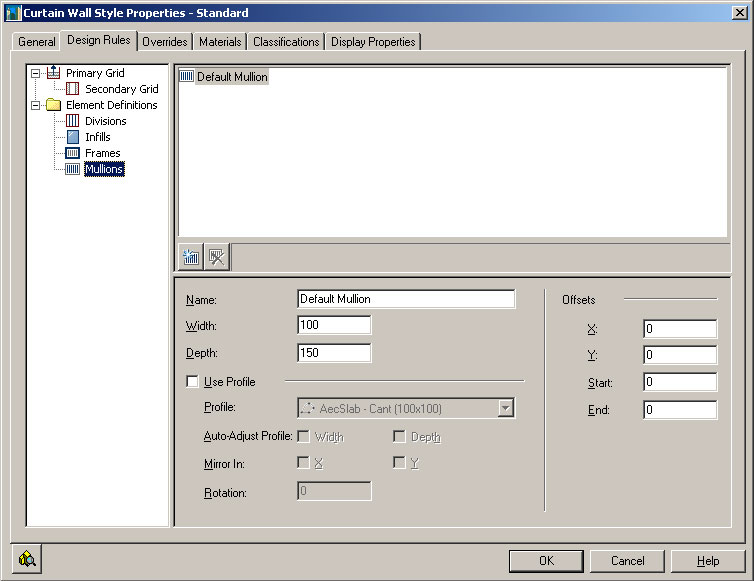
Select OK button to save Curtain Wall Standard properties.
Select OK button to save and exit Curtain Wall Style Manager.
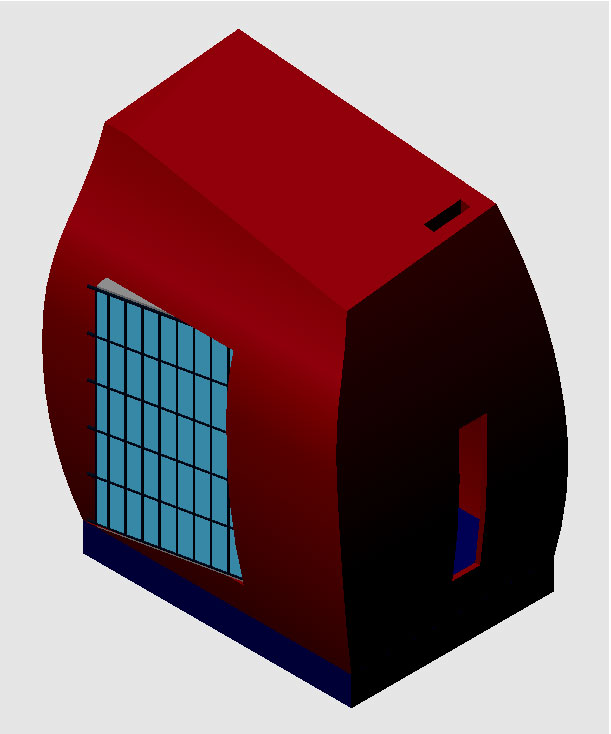
52. From the menu select: Design -> Curtain Walls -> Add Curtain Wall
In the AutoCAD Properties dialogue box the Curtain Walls Properties is dynamically specified.
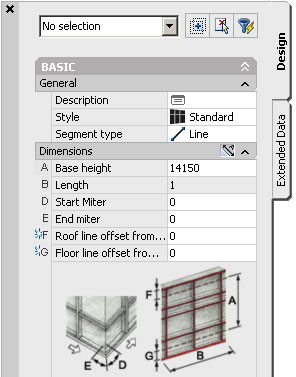
Change (A) Base Height: 14150
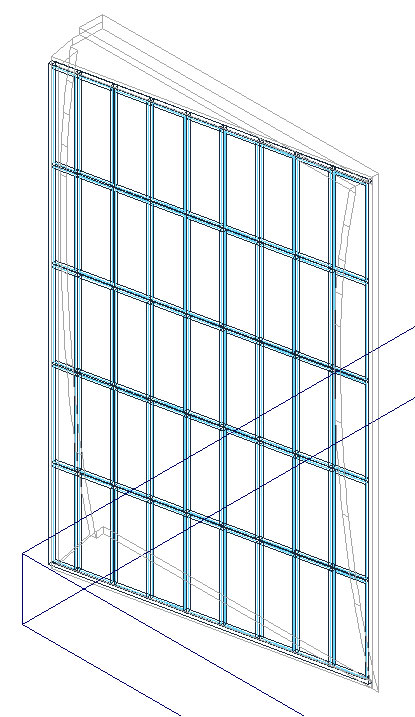
Now lets create the curtain wall:
Type: -75,0,200 (Press Enter)
Type: @0,8811.65 (Press Enter)
Type: (Press Enter) to exit command.
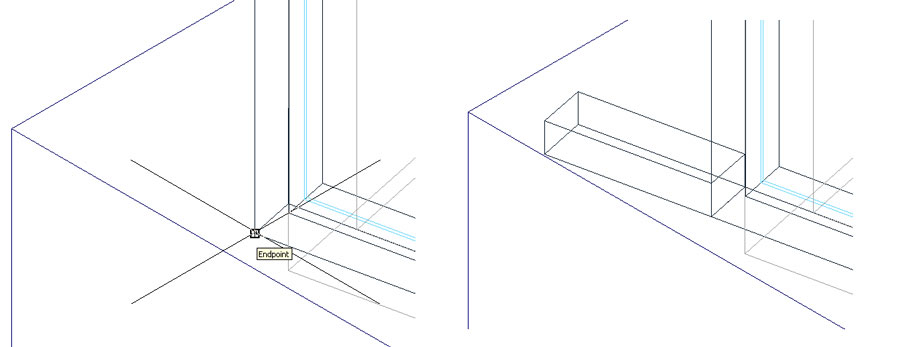
53. Create the first horizontal frame extension element.
Type: box (Press Enter)
The beginning of the horizontal frame extension is at the point endpoint of the bottom end of curtain wall frame (-150,8811.65.200).
Type: (-150,8811.65.200 (Press Enter)
Type: @150,488.35 (Press Enter)
Type: 100 (Press Enter)
We now need to change the ucs so we can array the horizontal element vertically.
54. Set up a new UCS for the window elevation.
Type: ucs (Press Enter)
Type: y (Press Enter)
Type: -90 (Press Enter)
Type: ucs (Press Enter)
Type: z (Press Enter)
Type: -90 (Press Enter)
Save the UCS as 'window elevation'.
Type: ucs (Press Enter)
Type: s (Press Enter)
Type: window elevation (Press Enter)
55. Type: array (Press Enter)
The dialog box shown below should appear.
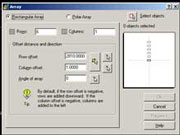
Set options listed below in the dialog box. Rows: 6
Columns: 1
Row offset: 2810
Click on the Select Objects button.
Select the first horizontal frame extension element.
(Press Enter)
Click on the Preview button.
Click Accept button.